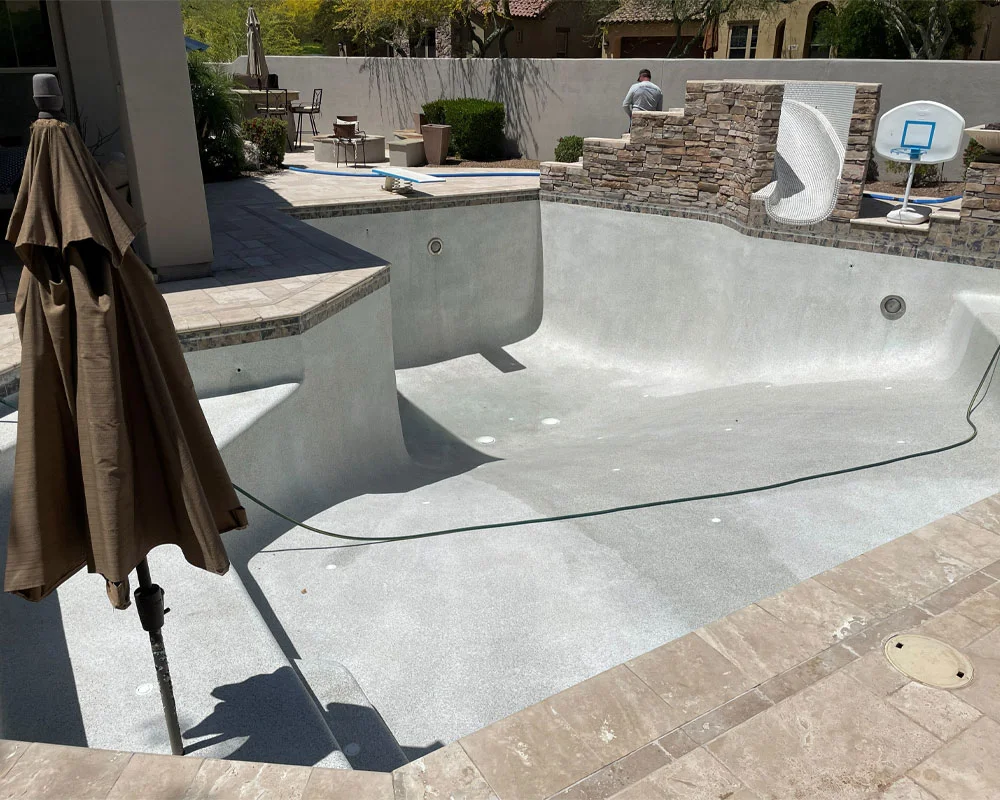
The excavation is done. The hole is in the ground. The equipment has rolled off the site, the soil has been hauled away, and you're left looking at a clean, gravel-based cavity in your backyard that is about to become a pool.
What happens next?
For most homeowners in the Dallas–Fort Worth area, pool excavation is the most dramatic visible moment in the entire build — and also the moment when they realize they don't fully know what's coming after it. The sequence of phases that follows the dig is precise, inspection-driven, and highly dependent on the quality of what the excavation crew left behind.
This guide walks through every phase of the pool build that follows excavation — what it is, why it matters, how long it takes, and why the condition of the excavated site determines how well each phase performs. Understanding the full post-excavation process is one of the most useful things a DFW homeowner can know going into a pool build.
Before walking through the phases, this point deserves to be made clearly: every single phase of pool construction that follows excavation builds directly on what the excavation left behind.
An accurate dig — laser-verified elevations, clean wall cuts, correctly specified depths throughout — means the plumbing crew runs lines to the right locations, the rebar crew installs steel to the correct dimensions, and the gunite crew applies shell to walls and a floor that match the engineer's plan. The build flows efficiently.
An inaccurate dig — off elevations, imprecise wall profiles, incorrect bench or spa depths — means every trade that follows compensates. The plumbing adjusts. The steel adapts. The gunite over-pours to compensate for wrong wall dimensions. Each compensation adds cost, adds time, and introduces structural variables the engineer didn't design for.
In DFW's expansive black clay soil — where precision excavation and a correctly installed gravel base are structural requirements — this point is amplified. The best gunite crew in the Metroplex cannot overcome a bad dig. The quality of the excavation is the quality ceiling for everything that follows.
Immediately following excavation — same day or next morning
If the gravel base isn't included in the excavation scope, it is the first thing installed after the dig. A 6-inch layer of clean crushed stone is spread uniformly across the entire pool floor — spa, bench areas, beach entry, every square foot of the shell footprint — and compacted to a stable, level surface.
Why it matters: The gravel base is the structural layer between the unstable DFW clay below and the pool shell above. It provides consistent support for the gunite shell, allows drainage to relieve hydrostatic pressure from below, and gives the plumbing crew a stable, level surface to run main drain lines accurately. In North Texas clay soil, skipping or compromising the gravel base creates structural risk from day one.
Timeline: Same day as excavation or first thing the following morning.
1 to 2 days after excavation is complete
With the gravel base installed, the plumbing crew arrives to run the pool's underground piping system. This is one of the most technically important phases of the build — and one of the phases most directly affected by excavation accuracy.
What happens during plumbing rough-in:
Why excavation accuracy matters here: Every plumbing penetration through the pool shell is located by the engineer's plan — specific horizontal and vertical positions based on the pool's design. If the excavation was off in elevation or wall position, the plumbing crew is running lines to locations that don't match the shell that will eventually cover them. This creates alignment issues that are expensive to correct after the gunite is applied.
Timeline: 1 to 3 days depending on pool complexity and feature count.
Scheduled immediately after plumbing rough-in is complete
In most DFW municipalities — Frisco, McKinney, Prosper, Celina, Keller, Southlake, and across Tarrant and Denton counties — a city inspector must review and approve the plumbing rough-in before any work continues. This is a mandatory inspection, not optional.
What the inspector checks:
Timeline: 1 to 3 business days for inspection scheduling in most DFW cities. This is where weather delays and inspector availability can affect the overall timeline.
Following plumbing inspection approval
The steel crew arrives to install the structural rebar framework — the skeleton that gives the gunite shell its strength and defines the pool's interior shape in three dimensions.
What happens during steel installation:
Why this phase matters: The rebar cage is the structural core of the pool. Once gunite is applied, you cannot change the steel without demolishing the shell. Any dimensional errors in the steel installation — incorrect bench heights, wrong spa dimensions, misaligned step configurations — become permanent structural features of the pool. The rebar crew works directly off the excavation walls and floor. An accurate dig produces accurate steel. An inaccurate dig creates a cage that compensates — and compensation in steel means the final shell doesn't match the engineer's plan.
Timeline: 1 to 2 days for a standard residential pool. Complex multi-feature designs may take 2 to 3 days.
Scheduled immediately after steel installation is complete
A city inspection of the steel and bonding system is required before gunite can be applied. This is one of the most critical inspections in the entire build — and it must pass before any concrete goes in.
What the inspector checks:
In DFW cities where geotechnical engineering is required — Southlake, Colleyville, Keller, and others with expansive clay protocols — the inspector may also verify that the steel configuration meets the soil engineer's foundation design requirements.
Timeline: 1 to 3 business days for inspection scheduling. This is a common schedule pause point — the build cannot proceed to gunite until inspection is passed and signed off.
The most visually dramatic phase of the build
Once the steel and plumbing inspections are approved, the gunite crew arrives for what most homeowners consider the most exciting day of the build. This is when the pool goes from a hole in the ground to a visible, three-dimensional structure.
What happens during gunite application:
Why DFW clay soil makes gunite application critical: In North Texas's extreme heat and dry conditions, freshly applied gunite requires active moisture management during the curing period. The homeowner is typically asked to wet the shell surface several times per day for 5 to 7 days after application to prevent the concrete from curing too rapidly and developing surface cracks. This is a DFW-specific requirement that most homeowners in other climates don't deal with — but in North Texas summer heat, it's essential.
Timeline: Gunite application typically takes 1 day for a standard residential pool. Large or complex pools may require 2 days. Curing period: 5 to 7 days minimum before the next phase begins.
Following gunite cure
Once the shell has cured, the tile and coping crews begin the finishing work that transforms the raw concrete structure into a recognizable pool.
Waterline tile: A decorative tile band is installed at the waterline — the most visible finished surface when the pool is in use. Tile selection ranges from glass mosaic to ceramic to natural stone, and the installation requires precise alignment around the entire pool perimeter.
Coping: The coping is the finished edge cap at the top of the pool wall — the transition between the pool shell and the surrounding deck. Coping profiles range from classic bullnose concrete to travertine, limestone, and modern square-edge designs. In DFW, travertine and limestone coping are among the most popular choices given their natural heat-resistance and aesthetic compatibility with Texas outdoor living styles.
Timeline: 3 to 7 days depending on pool size and tile/coping complexity.
Concurrent with or following tile and coping
The pool deck — the surrounding surface area that frames the pool and creates the outdoor living environment — is poured, set, or installed at this phase.
Deck options common in DFW pool construction:
Why the excavation affects the deck: The final grade established by the excavation crew determines how the deck drains. Properly graded soil around the pool footprint sends water away from the shell. Improperly graded ground ponds water against the deck and the pool shell — creating drainage problems that are visible and expensive after the deck is poured.
Timeline: 3 to 7 days for standard deck construction depending on size, material, and complexity.
Concurrent with or following deck
The pool equipment pad — typically located at the side of the house or in a designated backyard area — receives the mechanical components of the pool system:
Timeline: 1 to 2 days for standard equipment installation.
The final structural phase before filling
The interior finish is the visible surface of the pool — the material you see and touch when you're swimming. In DFW, the most common interior finish options are:
Why timing matters for plaster in DFW: Interior finish application must be done in appropriate weather conditions — not in extreme heat (which accelerates curing and creates surface issues) and not in freezing temperatures. In DFW, the spring and fall windows are ideal for plaster work. Summer applications require additional precautions.
Timeline: 1 day for application. The pool is filled immediately after plaster — filling cannot be delayed or the plaster will cure unevenly.
After equipment installation and safety barrier completion
The city final inspection confirms that the entire pool build meets the approved permit drawings and local code requirements. In DFW municipalities, the final inspection typically covers:
The pool cannot be filled and used until the final inspection is passed and a certificate of completion is issued.
After filling is complete
Once the pool is filled — a process that takes 12 to 24+ hours depending on pool size and water pressure — the pool builder or equipment technician performs the startup:
Timeline: 1 day for startup. Water chemistry stabilization continues for 2 to 4 weeks after filling.
Here's a realistic timeline from completed excavation to first swim in North Texas:
Gravel base: Same day
Plumbing rough-in: Days 2–4
Plumbing inspection: Days 4–7
Steel installation: Days 7–9
Steel inspection: Days 9–12
Gunite application + curing: Days 12–20
Tile and coping: Days 20–27
Deck construction: Days 22–30
Equipment installation: Days 28–32
Interior finish + fill: Days 32–35
Final inspection: Days 35–38
Startup and orientation: Day 38–40
Total post-excavation timeline: 8 to 12 weeks for a standard DFW residential pool under normal weather and inspection scheduling conditions. Complex pools, weather delays, and inspector scheduling in busy seasons can extend this to 14 to 16 weeks.
City inspection scheduling: In peak spring and summer season, DFW inspection queues can run 3 to 7 business days rather than 1 to 2. The plumbing and steel inspection pauses are the two most common schedule extensions in DFW pool builds.
Weather: North Texas thunderstorm season (April–June) can pause gunite application, deck pours, and plaster work. A significant rain event mid-gunite-cure requires extended curing management.
Material availability: In DFW's active construction market, certain tile selections, coping materials, and premium pebble finishes occasionally have lead times that extend the tile and coping phase.
Scope changes mid-build: Adding or modifying features after steel is installed creates the most expensive and time-consuming delays in the post-excavation build. Final feature decisions should be locked in before the rebar cage goes in — not after.
Every phase described in this guide depends on the excavation that preceded it. Accurate walls, correct elevations, a properly installed gravel base, and a clean site handed off to the next trade — these are the foundation conditions that allow every subsequent phase to perform as designed.
At Pacesetter Excavation, every pool excavation we complete across the Greater Dallas–Fort Worth area is executed to the standard that the phases described here deserve: laser-checked elevations, 6-inch compacted gravel base, same-day haul-off, and a site left ready for the plumbing crew to go to work.
We serve DFW homeowners and pool builders in Frisco, Prosper, McKinney, Celina, Argyle, Southlake, Keller, Trophy Club, Flower Mound, and across North Texas.